Red Fox Cycling - Yin Yoga for Cyclists -Sequence 1
- Red Fox Cycling

- Nov 30, 2020
- 7 min read
By Victoria Lee

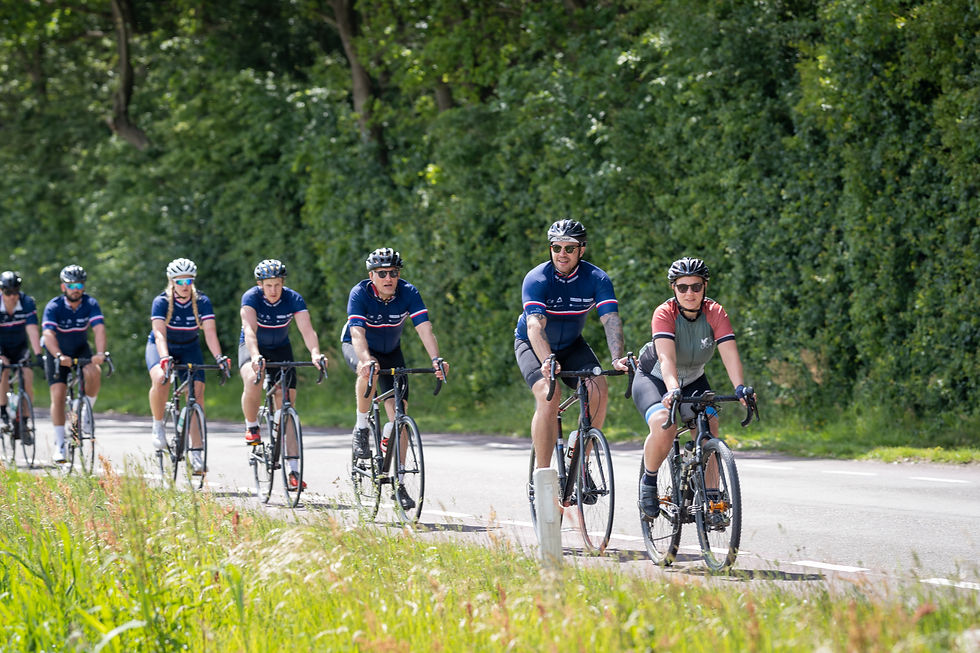
There is no doubt that cycling is fantastic for both our physical and mental health, offering cardiovascular benefits as well as increased muscle strength and endurance. But cyclists are often all to familiar with the effects of a build up of tension in the lower back and hips and are no stranger to tight shoulders and an upper back.
Long rides and unbalanced postures can result in aches and pains, commonly felt in the neck muscles. Through awareness and mindfulness whilst riding and conscious adjustments of position on the bike, we can we can work on prevention. If it’s too late for prevention, a little yin in your life might just be the cure!
Forget everything you know about active yang types of yoga, yin is the all inclusive passive member of the family. Holding poses for an average of 3-5 mins, yin works deep into the connective tissues of the body, bringing love and attention to those repetitively worked joints. Working on our ligaments and tendons, and deep into our fascia (a connective casing of tissue that supports all our organs, blood vessels, bones, nerves and muscles within the body) a regular practice allows the yin tissues to release stored tension improving joint mobility, increasing flexibility and circulation, whilst having the benefit of calming the body and over active minds.
We have introduced specially tailored outdoor yin for cyclist sessions to our Escape the City rides, relaxing and rejuvenating those well worked bodies. We’ll also be supporting you in the run up to all our rides with online access to a series of short sequences for you to practice at home.
(Props are key to supporting ourselves within the poses. But don’t rule yourself out because you don’t own a bolster or yoga blocks, everything can be easily substituted with whatever you have to hand. A camping mat can become your yoga mat, a bolster can be switched for a rolled up sleeping bag, a meditation cushion for a folded camping towel, and a book can become a block.)
Our first sequence - 3 minute holds:

Start in a comfortable seated position. Maybe cross legged, one leg in front of the other, or maybe in a kneeling position. Rest your hands on your thighs and softly close your eyes. Taking the first few moments, draw your attention inwards, starting to focus on your breath. Taking a few slow deep breaths, in and out through the nose. Try to keep the exhales longer than the inhales. Lightly scanning through the body, notice if you are holding tension anywhere, see if you can soften into that part of the body, particularly as you exhale. Feel the length through your spine, all the way from the lower back, middle back, upper back, through the neck and right up to the crown of the head. Now take a slow deep breath in through the nose and sigh out through the mouth, let it all go. Slowly blink open your eyes and lets begin.
Butterfly (flexion of the whole spine; flexion, external rotation and abduction of the hips)

Starting from a seated position bring the soles of your feet together as you let gravity ease your knees gently towards the ground. You may find that sitting on a cushion or folded blanket gives you the space required in the hips to come into the pose more comfortably. Slide the feet away from you, allow the back to round as you slowly fold forward over the feet. The elevation from sitting on a prop will assist with the fold. Your head can hang, but if this puts too much strain on your neck either use your hands to prop the head, or use a bolster or construct a tower with your blocks. If you are feeling any strain in the knees, support them with any props to hand. With every exhale feel yourself relaxing into the pose as we hold for 3-5 mins. Focus on the breath, envisage sending the breath to where you are feeling the pose, in the hips, inner thighs or lower back. As with every pose in yin, a little discomfort is part of the practice, but you should never feel pain. If you do feel any sharp pain in any of the poses, either take an adjustment or slowly come straight out of the pose and move to an alternative asana.
Half Butterfly (flexion and lateral flexion of the whole spine; flexion, external rotation, abduction of the hips)

Begin from a seated position, if the extra space is required elevate your hips with a cushion or folded towel or blanket. Extend your right leg out to the right, keep your left knee in bringing the sole of your foot to the inner thigh. If there is any discomfort in the bent knee, support with either a block or your cushions or bolster. Keep legs wide apart and lengthening through the crown, turn your upper body to face the out stretched leg. Use the opposite hand to help with the rotation, then allow yourself to fold forward. If you are very tight in your hamstrings you may find bending the knee and supporting with a prop gives you the extra space to release further into the pose. Letting gravity assist you into the fold, find your own edge, stopping before the point of pain. Find stillness, we’ll hold here for 3-5 mins. Keeping your awareness and sending the breath to where you are feeling the effects on the body, a few minutes into the pose you might find you are able to round down a little further bringing the head closer towards the knee. Listen to your body, if you do feel any pain, ease back or slowly and mindfully come out of the pose.
Coming out, push the floor away, slowly allowing yourself to roll up. Bring your hands behind you, lean back as you release the folded leg.
Now repeat with the opposite leg.
Melting Heart (extension of the middle and upper back; gentle extension of the neck; flexion of the arms and shoulders)

Come into an all fours position with your hands directly under your shoulders and your knees directly under your hips. Maybe find a little movement through the spine before walking your hands forward in two parallel lines until your forehead comes to rest on the mat, with your hips still vertical above the knees. If your forehead doesn’t reach the mat, take a folded blanket or a block to support your head. If like me you have a lot of tightness in your shoulders you may find taking the arms wider releases that tension allowing your chest to drop further towards the mat. As you continue to breathe deeply in and out through the nose feel the upper torso expanding on your breath in and your heart melting towards the floor on your slow long breath out.
With time in the pose you mind find the shoulders have relaxed and you are able to bring the arms back to parallel lines, or you may not - find a position that works for you, and then find stillness.
As we come to the end of our 3 minute hold, push your palms into the floor and slowly raise back up to an all fours position.
Sphinx (compression of the sacral lumbar spine; tension of the front torso)

From our all fours position with the hips directly above the knees and the shoulders directly above the wrists, drop down, placing the elbows below the shoulders with the forearms outstretched in front of you in two parallel lines. With ease, straighten the right leg behind you and then the left moving through a forearm plank position before lowering to the mat. Un tuck the toes, gaze straight forward or lightly tuck the chin to elongate the back of the neck. Relax any tension in the shoulders and buttocks as we focus on the breathing. There shouldn’t be any pain in the lower back, if this position is too much move the arms forward to reduce the curve of the spine. If the weight of the head becomes puts too much stress on the neck you can use your arms and hands to form a cradle to support. Be careful not to crunch the neck, remembering the gentle tuck of the chin to give length.
As we come out of the pose, slowly lower to the mat, maybe turning the head and resting on one ear and then rotating the head to the other or if this is too much for the neck look straight down forming a pillow with the backs of the hands.
Childs Pose - Narrow Leg (flexion of the hips and spine; flexion of the knees; plantar flexion of the ankles)

Come to a kneeling position on your mat. Focus on lengthen the spine, stretch your arms up above the crown of your head imagining one long line from the base of your spine to the tips of your fingers, now keeping hold of that length slowly fold forward. Bring your belly to the tops of the thighs and your forehead down to rest on the mat. Bring the arms back to rest parallel to your legs with your palms facing up towards the sky. If you find your forehead is unable to reach the mat maybe place a cushion or block underneath the raise the ground to you or if you find your buttocks are a long way from resting on your feet you may find the support of a block between allows your hips to relax further. You may also want to pad the mad with a folded blanket if there is any discomfort for the knees. Find what works for you and come to stillness.
Breath deeply into the belly, feel the compression against the thighs and the expansion of the back of the rib cage. As the upper back opens with each deep breath relax the shoulders letting them fall further towards the mat. If the mind wanders bring it back to focusing on the present, where you are feeling the pose and sending the breath to any parts of the body that need extra attention.
Slowly pushing the palms into the ground, push back up to a seated position.
Savasana (Time to relax)

Time to come into the restorative pose of savasana, also known as ‘corpse pose’. Your only focus here is to fully let go and relax. Lie flat on the mat with your legs comfortably spread, arms relaxed alongside your body with the palms facing up as your feet gently fall open. Feel the entire length of the body supported by the earth. Breathe naturally releasing all tension and feel yourself melting into the mat. Take a few minutes here to let your body rest and really feel the benefits of the asanas. Release any held tension in your shoulders, jaw or forehead and bring a smile to your face as you thank yourself for taking this time for you to practice today. Namaste!
Remember Yin isn’t performance yoga or a competitive practice. The benefits come from focus and awareness on how the poses feel, not how they look. Everyones anatomy varies, so by default the poses will look a little different. Focus on the breath, relaxing into the pose and let gravity and time do the work!